Configuring ZCard and ZCal on an Android device
ZCard syncs contact data between your Android device and any number of Zimbra servers.
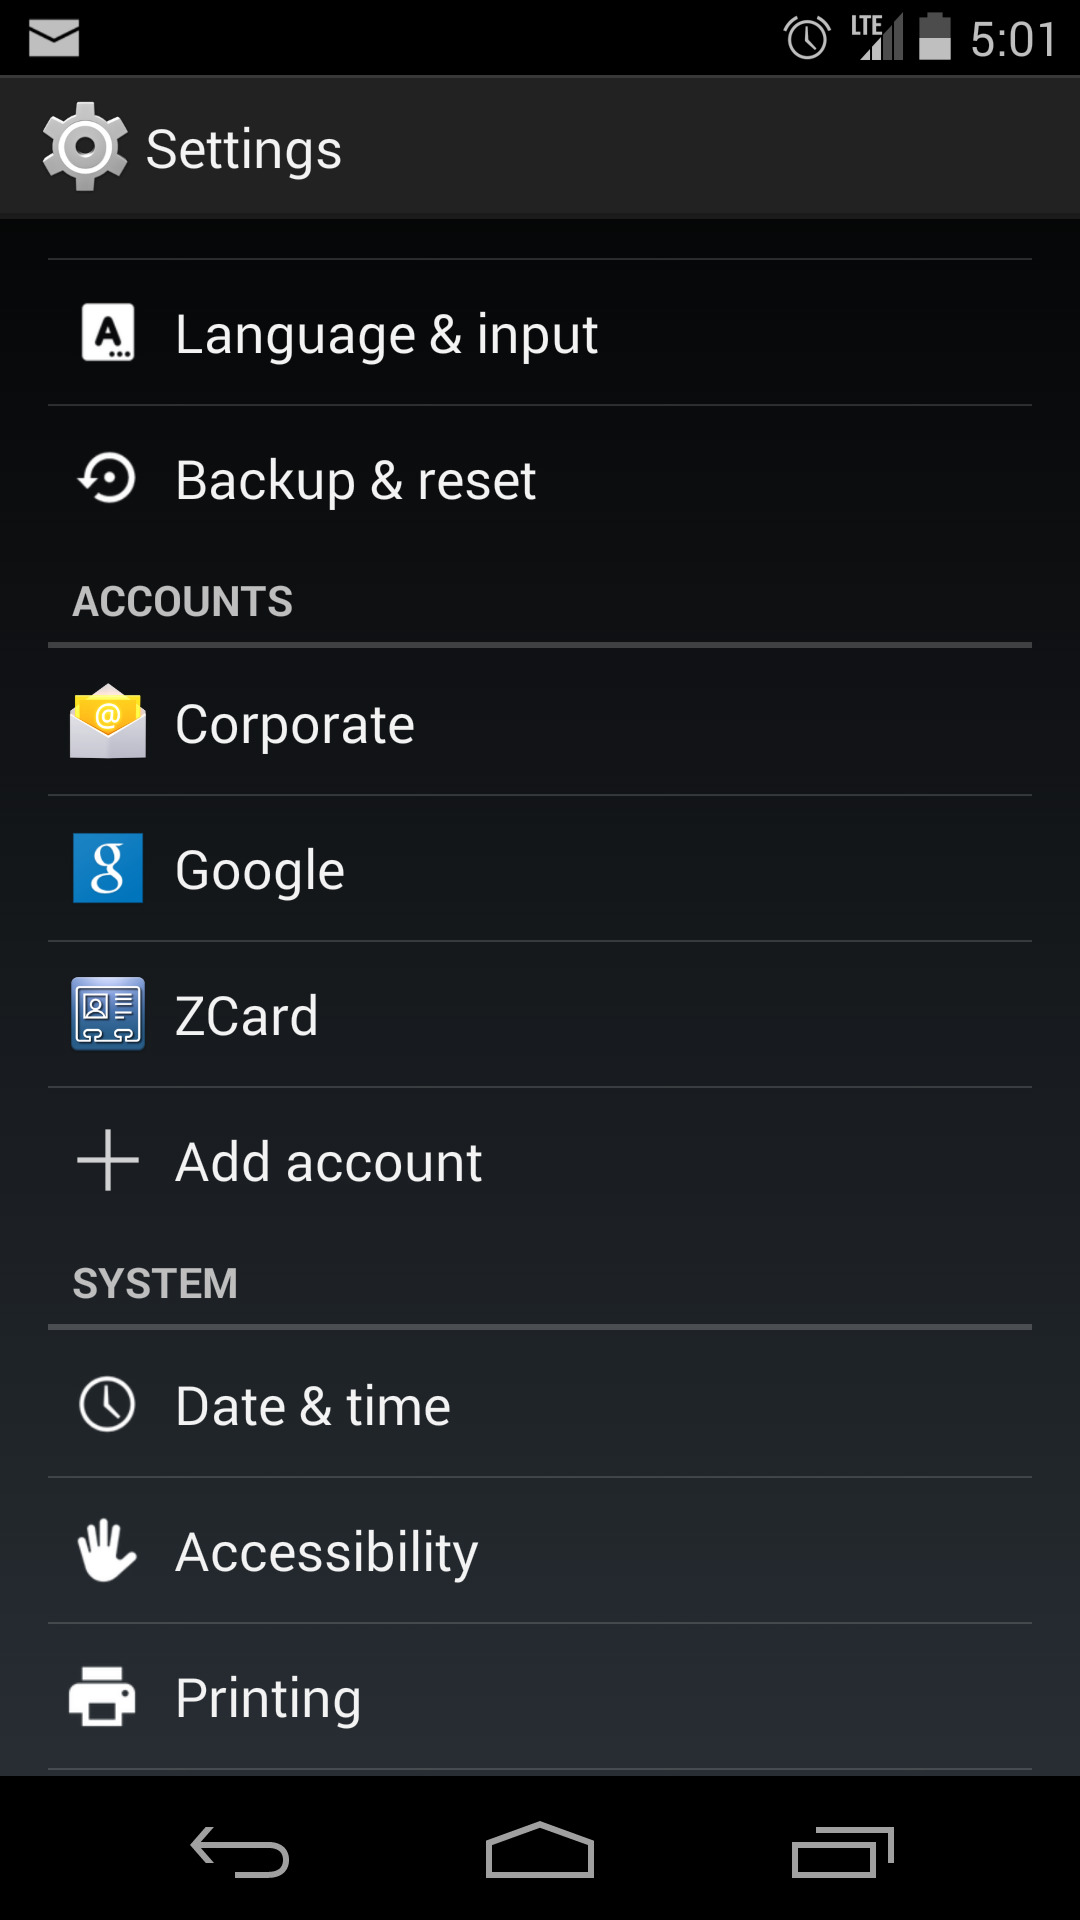
Adding Accounts:- Navigate to Settings, then click "Add Account" under the "Accounts and Sync" section
- A list of available account types on your device is displayed. Touch ZCard
- Enter your server's host name, and the email address and password for your account.
- If your server uses a self-signed certificate, a dialog will pop up asking you to accept the certificate.
- Click Sign in to add the account. You can repeat this process to add multiple accounts.
- Once the account is added successfully, ZCard will appear as an available account type under "Accounts"
- Sync Type: Both, server to device or device to server
- Sync Interval: Frequency between syncs. Lower intervals use more battery.
- Sync conflicts: Determines the edit that should take precedence when a contact is modified simultaneously on the device and on the server.
- Wi-Fi Only: If checked, syncs will happen only when the device is connected to a wireless network.
- GAL Sync: If checked, the server's Global Address List will be synced with the device under a group with the same name, so you can look up GAL contacts from any app on your device
- Sync Tags: When checked, tagged contacts will be added to a group of the same name on the device